

Unleash Your Summer Glow: The Art of Fake Tanning for People of Colour
Table of Contents
* affiliate links
Introduction
Achieving a natural-looking glow has never been easier. By following these simple steps, you can confidently rock your summer holiday glow all year round! Fake tanning on black or brown skin can be a bit tricky, but don't worry - we've got you covered at Isedas Studio.
Understanding your skin type, choosing the right tanner, and application techniques are essential for achieving natural-looking results. In this comprehensive guide, we will take you through the pros and cons of fake tanning on melanated skin, pre-tanning preparation, the application process, and post-tan maintenance.
With the right products and techniques, you'll be able to flaunt a beautiful, sun-kissed glow all year round. So, let's dive in!

Understanding fake tanning on PoC skin
Fake tanning on melanated skin isn’t tricky. Understanding how fake tanning works on darker skin tones is the first step to achieving a healthy and natural-looking glow. Some misconceptions about fake tanning on PoC skin include the idea that it's unnecessary and that it will make your skin look orange.
On the contrary, fake tanning on PoC skin can provide numerous benefits, including evening out the complexion and hiding blemishes and scars. By following the tips outlined in this guide, fake tanning on black and brown skin can be done successfully and with confidence!
Dihydroxyacetone (DHA) is the active ingredient in fake, sunless tanning. DHA is a simple carbohydrate which is often derived from plant sources such as sugarcane. DHA reacts with the keratin proteins present in the outmost layers of skin; various amino acids (which are the building blocks of proteins) react differently to DHA and produce melanoids (skin pigments) ranging from yellow to brown; these pigments are similar in coloration to melanin.
Pros and cons of fake tanning on PoC skin
If you are considering a fake tan, it's essential to consider the pros and cons associated with getting a fake tan. Here are the factors to bear in mind:
Pros of fake tanning:
-
Provides a healthy and safe sun-kissed look without sun damage
-
Helps to mask skin imperfections like blemishes, stretch marks, and scars
-
Lasts longer than makeup and is less expensive than body treatments
Cons of fake tanning:
-
Risk of getting an uneven tan or orange-y look with improper technique
-
May cause skin irritation to people with sensitive skin or acne
-
Can be messy
Choosing the right fake tanner for PoC skin
When it comes to choosing the right fake tan for PoC skin, there are a few key considerations. First, determine your skin type to select a formula that suits your needs (oil, cream, mousse etc). Next, think about your desired result, whether you prefer a subtle or deeper tan, choose an intensity based on this. Also pick a shade that complements your natural skin undertone as this is the KEY to avoid looking orange.

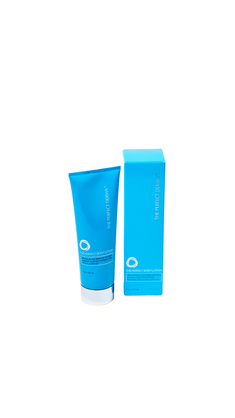
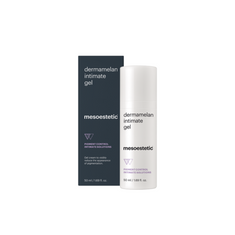
Finally, carefully read and follow the product instructions for the best results. Before applying all over, conduct a patch test to check for any allergic reactions or unwanted results. Remember that practice makes perfect, and it may take a few tries to find the perfect fake tan for your melanated skin here are some of our faves.
Pre-tanning preparation for optimal results
To ensure optimal results from your fake tan, it's essential to prep your skin before the procedure.
At Isedas Studio, we recommend body microdermabrasion to exfoliate the skin and remove dead skin cells, giving you a smoother and brighter complexion and body peels to help with stubborn scarring and pigmentation.
Prepping your skin with these treatments before using fake tanner ensures that the product adheres better to your skin and lasts longer. Plus, it helps to avoid streaky or uneven tans. Trust us, your skin will thank you for it.
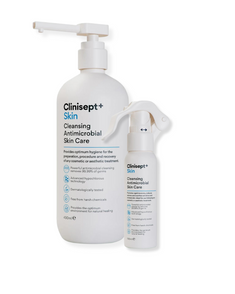
Here are some tips to prep at home. Exfoliation is something that we should all do regularly to remove dry, dead skin cells. The skin on our body is a lot thicker than the skin on our face, meaning that it is able to tolerate regular exfoliation. Exfoliate the night before your spray tan thoroughly using body mitts or a granular scrub such as the First Aid Beauty KP Bump Eraser Body Scrub* to remove any dead skin and smooth out your skin.
Pay close attention to your hands, elbows, knees and feet as these are areas that tend to be dry and crusty. If you are planning to remove hair around the time of your spray tan, do so 24 hours before in the case of shaving and 48 hours before in the case of waxing, sugaring, epilating and use of hair removal creams. This is because the hair follicle is open after hair removal, if tan comes in contact with it, little dark dots can appear in this area that will stay for the duration of your tan.
Paint your finger nails and toenails using coloured or clear polish, especially if they are acrylic or gel. This is because the spray tan can stain your nail beds and artificial nails.
The application process
Let's get into the nitty-gritty of the application process for fake tanning. The secret to avoiding streaks is to use a tanning mitt* + blending brush* and not your bare hands. Trust us, your palms will thank you. Fake tan should be applied onto clean and dry skin that is product free, moisturiser, perfume, deodorant etc creates a barrier which the spray tan cannot penetrate. Not moisturising can be hard to do, especially for people of colour. If you cannot go without moisturiser, arrange you spray tan at a time where you have the time to have a quick shower before the treatment. However, you should lightly moisturise dry areas like knees, elbows, and ankles to prevent patchiness.
When it's time to apply the tan, start from the bottom and work your way up, using your tanning mitt or gloves. Make sure to blend in the product in short lifting strokes to promote a streak-free finish. Be extra careful around joints and bony areas, as they tend to absorb more colour. Take your time and don't rush the process, blend any hash edges with a fluffy blending brush. Allow the tan to dry completely before getting dressed to avoid smudging. Dark and loose clothing and footwear should be worn after your can as tight items can leave marks on your skin.
Post-tan maintenance
Post-tan maintenance is crucial for prolonging your bronzed look. At Isedas Studio, we recommend moisturising well to maintain your skin's luminosity between exfoliations, keeping it supple, and boosting its radiance. Additionally, avoid prolonged exposure water as much as possible to prevent the tan from fading. Use a pH balanced body wash and moisturiser daily to keep your skin soft and supple, which will enhance the look of your spray tan and prolong its life. Avoid using exfoliating products (chemical and physical) during days 1-4 as this slough off tanned skin cells, leaving you looking patchy and uneven.
However, start using physical exfoliants after day 5 to help your tan fade away evenly. If you’re are planning to wear makeup whilst rocking your spray tan, ensure that you have the correct foundation shade (depth and undertone) for a seamless, natural look.

Conclusion
At Isedas Studio, we understand that fake tanning on melanated skin is new territory, but with our professional tips outlined in this guide, you'll be able to achieve a beautiful and natural-looking glow all year round.
Don’t wait any longer to get your glow! Book your appointment now, we’ll prep your skin professionally to enjoy a smooth canvas to enjoy fake tan on all year round